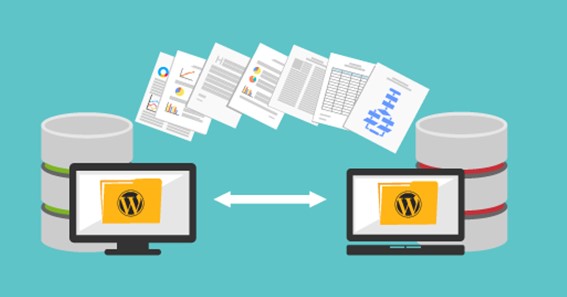
Migrating your WordPress to a new host can be a daunting task as it affects your entire website content. However, migration is sometimes inevitable in the case of growing your business website or scaling hosting features.
To help ease the process, this article will walk you through three easy ways to migrate your WordPress site to a new web host.
Choose a New WordPress Host
Before we go into the ways of migrating your website, you’ll first need to find a new WordPress host. Before choosing between hosting plans, consider how your new web hosting should perform in these aspects:
- Server uptime – look for customer reviews or surveys conducted about the hosting provider’s performance and their uptime. Choose a company that guarantees 99.9% uptime.
- Security – find out if the new hosting provider implements up-to-date security measures to protect your website from any cyber-attacks. Make sure that it includes an SSL certificate and a secure content delivery network (CDN).
- Reliable features – look for a web hosting provider that offers helpful features, such as 24/7/365 customer support, managed hosting services, supported website-building platforms, or website migration support.
- Pricing – note that the price you pay for the hosting plan now might change once you renew it. Check if a hosting service has great value for money by reviewing their renewal prices and asking if they offer a trial period.
First Way: Contact Your Hosting Provider
The first and easiest method to migrate your WordPress site is requesting migration from the new hosting company. Some providers offer free migration services, while others will charge extra.
This method is hassle-free as the hosting provider’s team will assist you throughout the process. Many also help set up and configure your existing site on the new hosting account.
Second Way: Use a WordPress Migration Plugin
The other way to migrate your WordPress site is by making the most of a WordPress migration plugin, such as All-in-One WP Migration. It offers a seamless migration process through simple steps:
- Download and activate the plugin on your current WordPress dashboard.
- Navigate to the All-in-One WP Migration plugin on the site’s dashboard that you wish to transfer, then choose Export from the dropdown menu.
- Click Export to and choose File from the dropdown menu.
- Once the retrieving process is completed, download the backup file in .wpress format on the pop-up window.
Click here – Mp4moviez 2021 – Download Latest 720p Hollywood Movies
Now, access the WordPress dashboard in your new hosting account. Then:
- Navigate to the All-in-One WP Migration plugin, and choose Import.
- Click Import from and choose File. Look for the previously exported files, then upload them. You can also drag and drop the files directly on the page.
- Hit the Finish button once the process is complete.
Note that there is a file size limitation when importing a site using this plugin. If you want to unlock more extensive features that include premium support, it costs $69 for a single migration process.
Third Way: Migrate Your WordPress Site Manually
If your hosting provider doesn’t have a free migration service or your chosen migration plugin doesn’t work, you’ll have to migrate your WordPress site manually. Let’s cover this process step-by-step.
Back-Up Your Website Files
Before starting manual migration, download all your WordPress site’s files to your local computer:
- Set up your file transfer protocol (FTP) account and connect to your current hosting account’s server.
- Open the public_html file on the FTP, then select all the WordPress files in it.
- Right-click on the selected items, then choose Download.
Export Your WordPress Database
If your website uses a MySQL database, don’t forget to export it to your local computer. Here are the steps:
- Access phpMyAdmin on your old hosting account’s control panel.
- Select the database where you store all your WordPress files, then click on the Export tab.
- Choose Quick as the export method and SQL as the database file format.
- Hit Go, then the download will start automatically.
Before moving on to the next steps, double-check that both your current and new hosting accounts have the same PHP version. This will help avoid any errors during the migration process.
You can check and change the PHP version via your hosting accounts’ control panels. On cPanel, navigate to the Software section, then click Select PHP Version.
Upload the WordPress Files to Your New Host
Move to your new hosting account’s control panel, then connect to your FTP client to complete these steps:
- Unzip your WordPress files first as they were compressed in a .zip file format.
- In your FTP client, click on the public_html folder on the Remote Site tab.
- On the Local Site tab, right-click on the folder containing your website files and select Upload.
Wait for the process to complete, then you’ll see your site’s files on your new hosting account’s File Manager.
Import Your WordPress Database to the New Host
Before migrating your WordPress’ site database files, create a new database first on your new hosting account. In your control panel:
- Open MySQL Databases.
- Enter your new database name.
- Create a new MySQL username and password for the new database. Take note of this information, as you will need it later.
Now, import your database files to the new hosting account. In your control panel:
- Go to the Databases section and select phpMyAdmin. Navigate to your newly created database, and enter its phpMyAdmin.
- Click on the Import tab.
- Select Choose File, and pick your previously downloaded SQL file.
- Leave the settings as they are. Click Go.
Edit Your Database Information in wp-config.php File
Next, update your database name in the wp-config.php file. If it still shows the database name of your old hosting account, your migrated website might show error establishing database connection.
To fix this:
- Open File Manager on your new hosting account’s control panel, then choose public_html.
- Locate the wp-config.php file, right-click on it, then choose Edit.
- Input your new database name, username, and password that you wrote down earlier in the following lines of code:
- Click Save.
Update DNS Settings
The last step in migrating your website is to point your domain name to the new hosting provider. Do this by switching your DNS nameservers to ensure your website visitors are redirected to the new server. If not, your migrated WordPress site won’t be accessible.
First, find out the DNS nameservers of your new web host. They’ll look something like these:
ns1.hostname.com
ns2.hostname.com
Note the DNS nameservers, then log in to the registrar where you bought your site’s domain name.
- After logging in, navigate to the settings to configure nameservers. Although this varies depending on the registrar, you can usually locate it under Domain Management or Domain Overview.
- Choose the Manage DNS button located beside the domain name of your migrated website.
- Change the default nameservers with the ones from your new web host.
- Save the changes.
DNS changes require up to 24 hours to propagate. You can check the status using What’s My DNS. Simply input your domain name, and choose NS on the drop-down menu to see the nameservers where your domain is pointing.
Contact your new hosting provider’s customer support if it’s still showing your old hosting’s nameservers.
Test and Run Your WordPress Site
Whatever method you choose for the migration, we recommend testing your website first before making it live.
Check if all posts and features like comments, forms, and plugins work smoothly after the migration. If your site can’t load any website content, try redirecting your images and file paths to the new URL.
If you find your website works smoothly as it was before, then congratulations! You’ve successfully migrated your WordPress site.
Conclusion
Migrating a website to a new host isn’t as difficult as it seems. Since there are multiple ways to do this, choose the method that works for you and matches your budget.
In this article, we learned the steps to migrate your website successfully. These are:
- Choose a new WordPress host.
- Pick one of the three migration options.
- Update your DNS settings.
- Test your website before going live.
We hope this article helps your WordPress site migration process. Good luck!
Click here – Wonderful internet site to shop for Instagram Likes